
 Posted by
 Welcome to [Contest 10] Win Without Any Hero
All you have to do is submit your entry which will show you can Win without a Hero.
You can Pick any difficulty above MAD with your choice of AIR and VISIBILITY.
CONTEST START DATE: March 02
CONTEST END DATE: April 02
CONTEST END DATE: April 22
RULES:
- You Must Attach A Replay With Screenshots Proving Gameplay!!
- You Cannot Use Any Hero No Matter What!!
- Can Only Submit Version 6.49+
- MAD Mode Minimal Submission
- Entry Submission Must Be Soloed!

- shtroumf, TeandyHence, Waffle(est) and 9 others like this
 Posted by


 Wait.. Could we get any more accurate results out of this?


 Posted by
  Posted by


 Posted by
  Posted by
  Posted by


 Posted by


 Posted by


 Posted by
 Posted by
  Posted by
 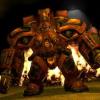 Posted by


